Tuesday, October 2, 2012

Dear Salmon and your Braised Turnip Friends,

I'm at that point in my life where shopping for discounts and sales is not only a necessity, but becoming a competitive sport. I'm not one of those aggressive crazies that you'll see out on Black Friday (I'd prefer Giving Tuesday instead...check it out!), but I do love seeing those yellow sale tags on my trips to the supermarket. When I found salmon on sale, 2 fillets for $5!!!, I thought I hit the jackpot! It was so beautiful. Just looking at the fillets before the seafood guy came over to help me take my pick, I had the cogs moving on how I would prepare it, if I was going to use a sauce or not, what side would I whip up, etcetera, etcetera. There are so many things you can do with salmon because of its heartiness under a sauce or glaze, its beautiful color, and its filling nature.

My greatest salmon story actually took place in Texas of all places. We were staying at the house of a family friend, and the father was a pilot. That weekend they decided to fly up to Alaska and go fishing. They came back the same day with a bounty of Alaskan King Crab and Alaskan Wild-Caught Salmon. I have never had a fresher meal in my life from those amazing fruits of the sea (save for maybe Hawaii, but that's a different category). Nothing compares to the richness of the meat from fish and seafood out of the frigid Alaskan waters. The crab was served simply with garlic butter and the salmon baked with lemon with a sprinkle of salt. You can't get any better than that. I think I was 12 when I ate this meal, and it is still a serious part of my culinary memory...this is probably one of the pinnacle moments where I caught onto what really fresh, amazing food can taste like. Now I'm here! And now we're going to head to the preparation of a meal in homage to my Alaskan epiphany:

Baked Salmon and Braised Turnips
Salmon fillets (for as many people as you're serving)
3 Cloves garlic, crushed
Olive oil
Salt

Turnips (I used a giant, organic turnip for 2 servings)
1-2T Butter
Olive oil
Parmesan
Bread crumbs
Salt
Black Pepper
Parsley

As you can already tell from the ingredient list, these recipes are simple as can be for preparation, yet the flavors have such complexity that the only result you will have is a step closer to nirvana. If you aren't familiar with turnips, they have this undeniably warm and sweet flavor with a texture between a radish and a potato. As for the salmon, the only thing you need to do is watch the cooking time. My fillets were about an inch thick, so I shot for 15-17 minutes. I flaked open some meat in the middle to check for doneness, then I pressed it back down when I was assured of its awesomeness. Really, it's no goof.

Okay, to prepare the salmon: wash the fillets and pat them dry. Set the fillets on parchment paper on a baking sheet, then drizzle lightly with olive oil and crank some sea salt over them. I chose to use crushed garlic this time, but slices of lemon would work just as well. So I crushed about three cloves of garlic and distributed them evenly over the two fillets. I rubbed all these beautiful ingredients into the fillets and made sure everything was uniform. You need to preheat the oven to 350º, and you can prepare the turnips until that oven is ready. When the oven is heated, you put the fillets in and set the timer on 15 minutes, then check and if it needs a couple more minutes put it back in...just make sure you pay attention so as to not overcook it.

The turnips on the other hand, need to be peeled and sliced thin, either with a knife, food processor, or a mandolin--I use the latter, it is so quick, but watch your fingers, the guard is always a pain to use, however a hacked off fingernail isn't too fun to nurse back to health either, is it? So take it easy, not all of us can be an iron chef (but one can dream, can't they?). Anyways, you want uniform slices of the turnips, and having them relatively thin really speeds up the cooking process, and when you have 15-17 minutes to get the hot food on the table, that's what you want! You can also add onions and garlic to the turnips, but I don't really find it necessary, seriously turnips are a powerhouse of glorious flavor. I heated some butter and olive oil in a skillet over high heat and added the turnips, then turned down the heat to medium-high. Make sure you stir those 'nips around to ensure that they are all covered and sizzling. The turnips will start to turn translucent and start browning after about 10 minutes, and at this time you can add about a 1/4 cup of breadcrumbs (or just sprinkle it around like I do until you think it's enough), your seasonings, and give it a slight stir to distribute it evenly. Finally, sprinkle that handsome collection of parmesan that you have kicking around in the fridge over the whole lot. At this point, I like to throw the turnips into the oven to give it that nice crisp on the top. I guess you could use the broiler for that too. How I gauged the time was based on the salmon. I threw the pan in there at the end of the cooking for the salmon (*gasp* but doesn't that lower the temperature of the oven?! Yeah, but I'm not too worried about it), and when the salmon was ready to take out, I let it rest for a few minutes, took my sweet time making it beautiful on the plate with finishing fleur de sel, and then the turnips were ready to be plated as hot as possible, because they do lose a magnificent amount of heat rather quickly.

You can add a second side of sautéed spinach or green salad, but I just went with the salmon and turnips. I just wouldn't go with the gratuitous rice pilaf because then you get a little overboard with the starches, and a salmon meal isn't supposed to make you feel heavy and stuffed. A side of fruit would be nice, like a citrus salad with a good olive oil and fleur de sel (but that goes without saying :D).

It makes a great lunch or dinner, and I daresay it is something you can accomplish as a weekday meal! So enjoy, dear friends. Let me know what you think! How do you prepare your salmon?
Bon appétit!

Listening to WFPK Radio Louisville with Kyle Meredith (they just played Grandaddy!!)

Monday, October 1, 2012

More Fish! Baked Flounder with a Buttery White Wine Reduction

Fish is something highly lacking in my diet since my return from the Mediterranean. I feel like I ate fish or seafood there everyday, and you honestly do feel healthier, not to mention you get to play around with sauces and flavors as complex or simple as you desire. I am a sucker for making sauces. This was not often seen in my travels in Spain, where golden sweet olive oil with a bite pretty much takes care of all the complexity you need in a dish (topped with sea salt of course), but I love love LOVE sauces. Fish really does open up that door for you. Between light and delicate sauces, a lot like the one I am going to show you today, and fish marinades or that all-powerful swipe of magical sushi sauce that Jiro Ono makes pure art out of. If you have never heard of Master Jiro Ono, please introduce yourself--he is an accomplished "itamae" or sushi artist I would say, and he is probably the most accessible of the fine sushi masters to the Western world (hence his 3-Michelin Star über-fame)--at 86 years old, that respect should already be a given without gratuitous tags from judgement boards, but I digress.

Today we are preparing a humble flounder fillet. I did some research around the interwebs on different approaches to preparing flounder. Because the fillets are generally quite thin, the suggestion was to roll up and toothpick together, then bake it seam down on parchment paper. It doesn't make for an astounding presentation because the fillet looks like an afterthought instead of the main show--so you'll note that with my sub-par photography skills...I'm sorry, I couldn't really style this one up as well, but the taste is great, so you'll have to take my word for it!

I made a sauce that was a white wine reduction with cubed butter. Oh, you say that's a beurre blanc? Well, yes I guess, except with less guilt because it is missing the heavy cream. I used a similar technique to the traditional beurre blanc, in which I whisked cubes of cold butter into the wine reduction a little at a time and heated gently until I reached that frothy consistency we want! Yes, it was phenomenal. See what you can do when you run out of ingredients ;) it's not the end of the world.

I also paired this with a sweet potato puree, but you can look at my previous post on Coq au Vin with Pureed Root Vegetables for a similar puree that included parsnips, daikon, and carrots, but you can sub sweet potatoes for any of those to get the same deal. Additionally, I blanched some zucchini on the side and drizzled the wine-butter sauce on that as well...incredible. Let me know what you think!

Baked Flounder with Buttery White Wine Reduction Sauce
Flounder fillets (1 per person)
Olive oil
Salt
Black pepper

3T Butter, cold and cut into cubes
1/4C White wine (more or less)
2 Cloves of garlic, crushed or minced
{OR}
1 Shallot, minced

Pimentón (smoked paprika)
Parsley
Salt
Black or White Pepper


The flounder is the easiest thing in the world to prepare, so perhaps you should start on your sauce first.  I would actually turn the oven on, prepare the fish really quick, then start the sauce. When the oven is preheated to 350º, then you throw the flounder in for 8-10 minutes and you should be well onto finishing your sauce. So, here goes!

Prepare the flounder fillets by washing and patting them dry. Drizzle both sides of the fillet with olive oil, salt, and a little black pepper (the pepper can hold off until final seasoning) and rub that into the fillets. Arrange them on parchment paper, rolled up and toothpicked, seam side down on a baking sheet. Set aside until the oven is preheated.

For the sauce you need to prepare your garlic or shallot. You can either mince or crush the garlic. If you crush it, you can remove the garlic later and have a smoother sauce, but if you want to mince the garlic, it adds nice texture and in my opinion the presence of garlic is always better than not. If you are using shallot, just mince it. In a small saucepan, add a touch of olive oil over medium heat just to get the garlic going. Make sure your fire isn't too high at this point because garlic easily burns, and that would ruin your entire saucy effort. When the garlic begins to get soft and fragrant, the saucepan should be hot enough to introduce the wine. If you are thinking of adding an herb like thyme or sage, this should be done while sautéing the garlic in order to release the flavor of the herb (**Have you thrown the flounder in the oven yet? This is about the time). Add the wine all at once and let it reduce down, stirring often. When it has reduced for about 8 minutes, you can whisk in the cold, cubed butter a few cubes at a time. Whisk the butter until completely melted and then add a few more cubes, repeat this process until all of the butter is used. Your sauce should be frothy and creamy, and it will hold this consistency even as you serve it over the fish and zucchini.

If you are preparing the accompanying sides, the pureed vegetables should be arranged first and then kept warm on the stove. The blanched zucchini literally takes 2 minutes after the water boils, so you can do that while you are making the sauce. To serve, simply place the flounder on a third of the plate (clearly the plate I used was too big), a dollop of potatoes on the other, and the zucchini on the final third. Spoon the sauce over the fish and zucchini, garnish the fish with a sprinkle of smoked paprika or pimentón, and parsley over the vegetables. ENJOY! It is delicious!

Thursday, September 27, 2012

Comfort Food: Tomato soup and Grilled Cheese with a Twist!

The changing of seasons from summer to fall is probably the most dramatic for me. I love walking through Cherokee and seeing spontaneous bursts of color in the trees that remind me that I do live in a temperate zone, where trees actually do change. I lived in Andalusia, Spain last year, and let me tell you, coastal pines are beautiful for the first couple of months, but when you expect seasons to change and leaves to change and something to get you into the spirit of making it through a long winter and nothing happens, it gets depressing really quick. On said walk through Cherokee Park the other day, my friend was getting a good laugh because I was flipping out over some crimson and gold all over a tree. Hey, it is something to flip out about!

Anyways, with such delight and dramatic natural change, comes the need for food that warms you up. I prefer vittles that warm the heart and soul as well as the stomach, so today's recipe is Tomato Soup from Scratch and Grilled Cheese with Truffle Oil. Yes, I know, we're getting fancy, but you can't get any more comfortable than this! My tomato soup just takes ripe, red tomatoes and makes them into something amazing; the number of tomatoes depends on how much soup you want. Also, this recipe is vegetarian, but I guess you could add some chicken stock if you don't think this is flavorful enough...hah, as if. Then with the grilled cheese, you can definitely experiment with the cheese type, just make sure it is a good melting cheese--we all love semi-hard cheeses (Manchego is my life), but please, those don't make a grilled cheese, just as Parmesan doesn't...don't try it. This time, I used cheddar--everyone loves a picture of orange grilled cheese :) It's just right.

So, here it is. Perfect for a rainy day like today! Cozy up, stand by the fire of the gas stove for a little bit, and warm yourself down to your very soul with the classic tomato soup and grilled cheese combo.

Tomato Soup from Scratch and 
Grilled Cheese with Truffle Oil
About 5 Ripe tomatoes
4 Cloves garlic
1/2 Minced onion
1T Rubbed sage
Sea salt
Black Pepper
Chili powder
Bread (for crouton-making)
Olive oil
1T Butter

4 Slices of whole wheat bread
4 Slices cheese
Truffle oil
2T Butter

The first thing you need to do is prepare the soup so it can cook down while you are frying up the goodness that is grilled cheese. Chop the tomatoes into small pieces. You can choose to take the skins off or not, I personally like the texture that the skin gives to the soup, as well as the color. If you want to do so, just boil them in water until the skin starts to break and then throw them in an ice bath--the skins will slip straight off. Then take care of your garlic and onion; I like to sliver my garlic and just chop the onion. Take one T of butter and about the same of olive oil and heat in a medium-sized pot over medium-high heat until just melted. Add the garlic and onion to the pot and fry up until translucent and fragrant, add the sage at this point and fry until just fragrant (it releases the herb's magic). The pot should be hot enough by now to add the tomatoes. Stir this beautiful mixture up until well combined and bring to a boil. Then simmer until thickened.

While the soup is simmering, you can make up the croutons! I simply cubed up some bread and I drizzled them with olive oil and salt and pepper on a baking pan. You can herb this up with oregano or sage too if you want. Then dry them out in a low-heat oven until they are crunchy enough, probably 15 minutes. If you want them a little toastier, up the temperature to 325, just flip them halfway through and keep an eye on them.

When your soup has thickened down, it is time for seasoning! Add salt, pepper, and chili to taste, and if you want some layers of flavor, drizzle a good olive oil right before serving. You can also make it creamy by adding cream...no way?!

Now for the grilled cheeses! You all know how to do this, but have you ever thought of making your favorite sandwich the greatest piece of bread and cheese that has ever touched your lips? That is where truffle oil will take you. I melted 2T of butter in the mic and I added a splash of truffle oil--trust me, it goes a long long way. Combine that happy mixture and use a pastry brush to brush one side of two slices of bread (the side that will go in the frying pan). Then you heat up your pan or iron skillet, and go to town making a grilled cheese. Place the butter-truffle oil side of the bread down on the heat, place two slices of cheese on top, and sandwich it up with the second piece on top. Flip when it is nice and toasted on the bottom--you might want to control your heat on this one, especially if you are using an iron skillet because they hold heat more efficiently than the average frying pan. I flip mine a couple of times just to make sure that heat is getting to the center and melting that cheese up all nice and gooey.

Finally you combine the Tomato Soup and Grilled Cheese into a happy party in your mouth. I put the croutons in the bowl and pour the soup over it, then I cut the grilled cheese into triangles because we all know that sandwiches taste better in triangles. At this point, you should be swimming in the warm, comforting flavors of deeply flavored tomato soup and soft, melty cheese with truffle oil rocking out your taste buds. So good!


Enjoy my friends, and may you smile even as the skies are grey. 


Tuesday, September 25, 2012

Meet Me at MacLaren's: Television Series Premiere Menu

I am admittedly one of the biggest fans of the show How I Met Your Mother (affectionately called HIMYM, or him-yim). This is unfortunately the last season, but fortunate at the same time because it is another great excuse to get creative with some food and munchables, as far as premiere parties go. I am one of those people who loves constructing new menus and making parties out of whatever I'm "nerding out" on at the moment. Just wait until The Hobbit comes out...goodness.

Now we are reveling in HIMYM, and I decided that we would make our menu MacLaren's themed to celebrate. MacLaren's is the bar where the gang hangs out in every episode, and occasionally we get a glimpse of the pub grub that such a trusty hangout offers. My menu includes some basic bar bite staples with some room to personalize, because there is more than one palette to please at a party. Thus, we have Crispity Crunchity Nachos, Hand-Dipped Chicken Strips with homemade Hot Sauce and Honey Mustard, as well as Ranch (not homemade this time), Mini-Best-Burgers-In-The-World, and Brownies. We also had pretzel nuggets and mustard to munch on, but I forgot to put those out, Hah! We were definitely well fed and we had leftovers (which makes lunch easy today).

So, as a result, today's post will be a marathon of recipes, so bear with me friends and you too can celebrate during this premiere week (or you can save these up for the finale *gasp*!).

Crispity Crunchity Nachos
8 Corn tortillas
Olive oil for drizzling
Salt
Refried beans
Cheese
Optional: Jalapeños, hot sauce, onions

This dish is really easy to personalize, it just depends on what you like on your nachos. I made mine simple because I was already going crazy with burgers and chicken strips. The special part of these nachos is that I made my own chips before throwing the toppings on. Seriously though, making your own chips is far easier than you think, and of course more delicious. 

Check it out: You simply cut the corn tortillas into quarters to make triangle chips, then you distribute them on a baking pan, not overlapping. Drizzle the tortilla pieces with olive oil and flip them all to make sure that both sides are coated with olive oil. Sprinkle with salt and put into a preheated 350º oven. I would check them after 10 minutes to see how they're doing. If they start curling up for you, then you should flip them over (this will give you maximum crunch) and bake them for another 5-7 minutes. You might need more or less time depending on your oven, just keep an eye on them. Everyone knows what chips are supposed to look like.

Take them out and let them cool, they will be crunchy by this point, so they will hold up when you spread on some refried beans. Then you distribute as much cheese as you want, I used slices of cheddar this time, but shredded Mexican cheese works, Oaxaca cheese is awesome, and you can sprinkle a little directly on the pan if you're like me and you love that crunchy burnt cheese. Throw them either under a broiler for a few minutes or put them back in that 350º oven until the cheese has melted and is bubbly. Perfection!


Hand-Dipped Chicken Strips
Chicken tenders
Buttermilk
Flour
Milk
Seasonings: Salt, Pepper, Chili Powder, Oregano (whatever you want!)

I originally got this recipe off of The Pioneer Woman Cooks and she nailed it! I used a seasoning mix of salt, black pepper, and Chimayo chili powder. The first thing I did was soak my chicken strips in a bath of buttermilk for about 15 minutes. If you don't have buttermilk on hand, you can simply mix milk and a bit of vinegar until the milk gets thick (starts to curdle). While that's waiting you can heat up the oil in your trusty iron skillet or frying pan. You need enough to pan-fry, so about an inch of oil. I used olive oil, but vegetable oil or your favorite frying oil would work too (I've heard great things about coconut oil). Also, you have to prepare that lovely breading, which is your seasoned flour and a couple splashes of milk. Mix that up well with a fork and you'll start seeing the little clumps of flour that so remind you of chicken strips...hm, how apropos! 

By now your chicken should have soaked enough and your oil should be ready, so it's time to dredge those babies in that sweet breading. I took each strip and pressed it into the flour mixture to make sure that it was well coated on both sides. Then I put these on a reserve plate that would hold the chicken to be fried. Another plate lined with paper towels needs to be on hand for draining after the chicken is finished cooking. If your oil is hot, the frying process is pretty easy, just give it a minute or two on one side, flip when it is as brown as you want it, and if it happens to need another turn, go ahead, that's fine. When they are as picture perfect as you want, set them aside to drain. 

Now you're ready to prepare your sauces! 
Homemade Hot Sauce is simple as can be. You take a small dipping bowl out (microwave safe) and you throw in three tablespoons of butter, a healthy shaking of Cholula hot sauce, and some minced garlic in the microwave for about 45 seconds, or thereabouts. Then you mix it all up and you should have a creamy hot sauce ready for dipping. I also like to throw in about a tablespoon of sesame seeds because they're gorgeous and taste great!
Honey Mustard Sauce is just that. I mixed two kinds of mustard: Organic mustard and Grey Poupon (I always picture that scene from Wayne's World when I say that) and then about a third of that mixture in honey. That was it. It came out great to my tastes, so you can experiment with other mustards too if you want. I believe that a large-grain mustard would work out well with this too.
Then you can add any other sauces you want, like Ranch dressing or Barbecue sauce.


The World's Best Burger

1-2lbs. Ground Chuck (or whatever you want to make your burgers out of)
1 Egg
Minced garlic or Garlic salt
Italian breadcrumbs
Chili powder
Parsley
Worcestershire Sauce
Barbecue Sauce
Optional: a spoon of caramelized onions

Everyone has their own idea of what the best burger in the world is, there was even an entire episode on it in How I Met Your Mother (Season 4 Episode 2: Best Burger in New York). This is the recipe that I grew up with, more or less, with a few changes. Basically, it is all about making the meat reach the depth of flavor you want, and making it go as far as it can (hence the breadcrumbs). I added chili powder where onion would be, and you can experiment as you go. I think that caramelized onions would take this to the next level too. Simply mix all of these ingredients into the meat and squish it around as well as you can until it is incorporated. Warning: it is bloody cold when it comes out of the fridge, so prepare yourself for some mind over matter exercises.

When the meat is mixed up, form them into the size of patties you want. Note that meat does shrink quite a bit when it is cooked. We were making mini burgers this time (I found mini buns, what?!) and layered them with cheese; it went well with the bite-sized bar bite theme. Heat a pan on high and throw the burgers in without touching. Alternatively, if you don't live in an apartment you can grill these up and get fancy. I think my burgers turned out awesome--they even had a char due to high heat pan, which was a real joy to clean up. Now all you have to do is construct the burgers.


I didn't go crazy with dressings like tomatoes, onions, pickles, etc, but you can do that if you want. I just put a spoon in the sauces I made and I brought out the bottle of barbecue sauce. Honestly, this burger is so flavorful, I feel like it stands on its own with just cheese. You can be the judge of that!

Finally, I made some brownies with heath bar bits inside, but that recipe is going to have to be for another post. You all have a great arsenal of recipes to make any episode of the last season of HIMYM legen...wait for it....DARY!

I would say this would go for any party that you need nibblies at. Enjoy and let me know what you think!

Monday, September 24, 2012

Quichetátatouille: Dishing up something new!

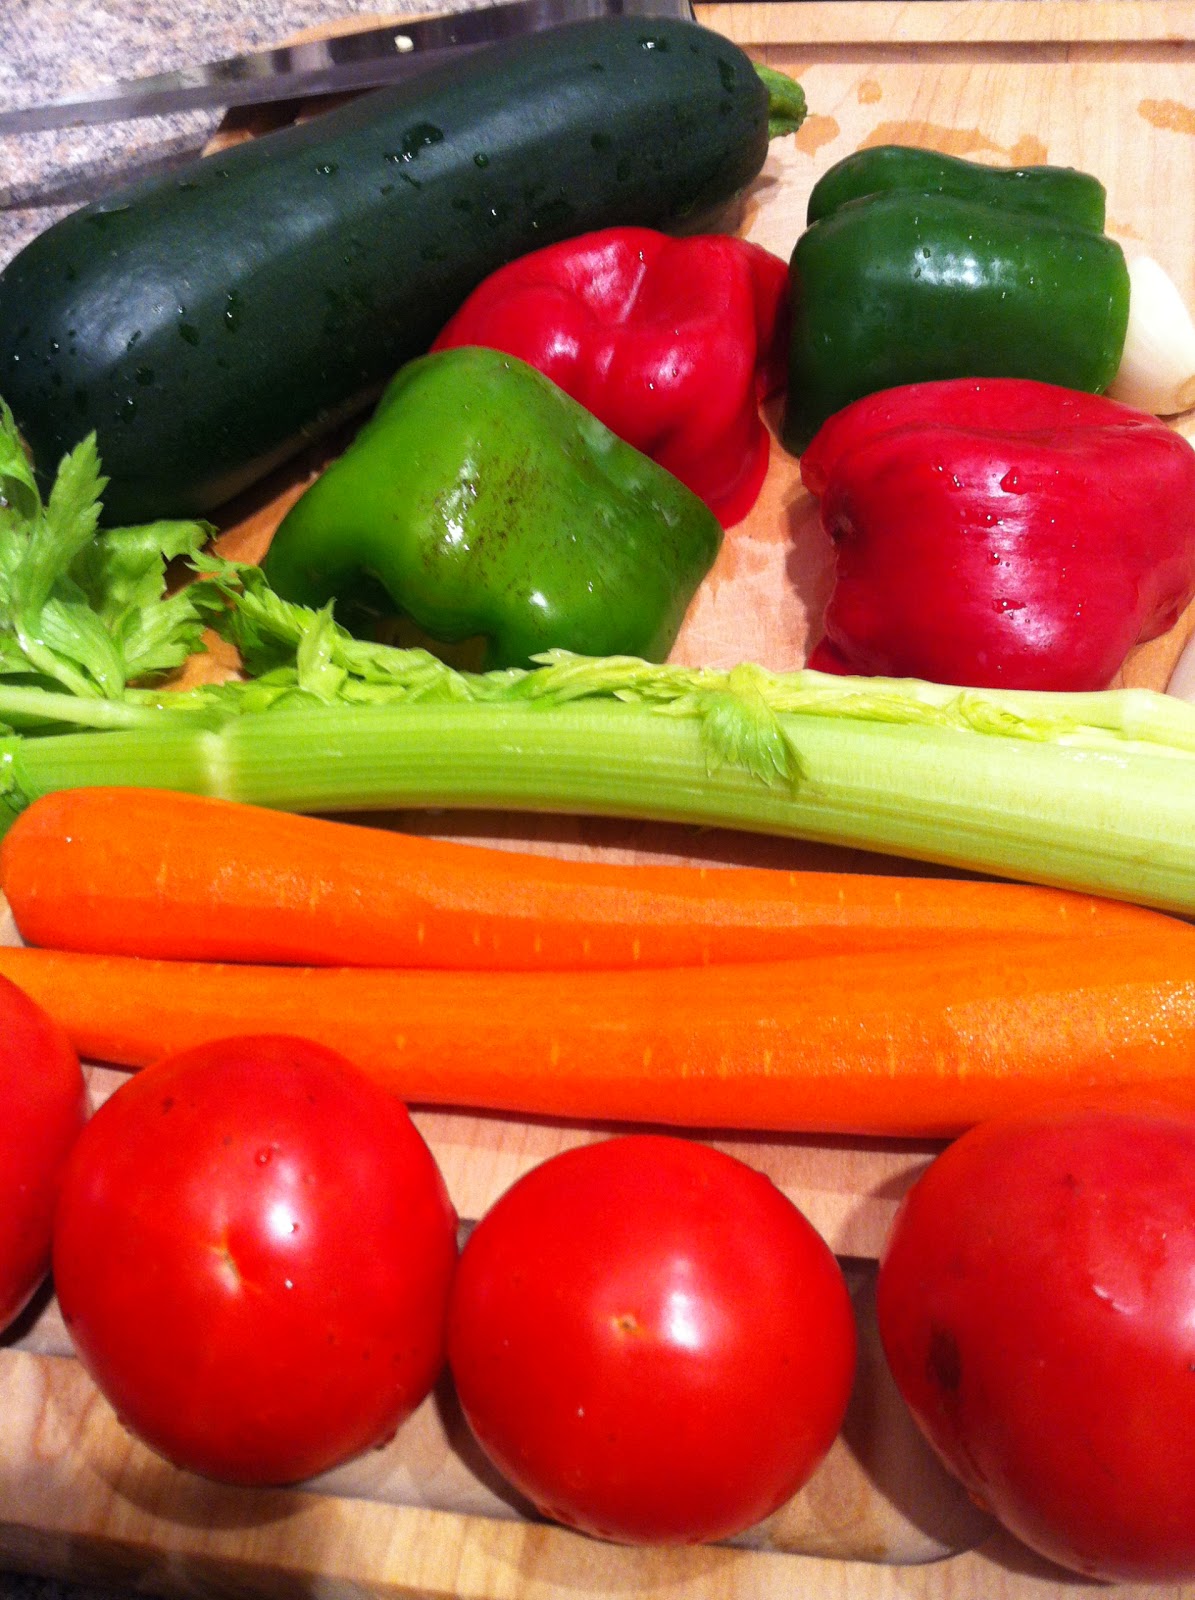
If you've read this title, you already know I've gone a little crazy with throwing things together. My kitchen was incompletely incomplete it seemed. I had the ingredients for a partial quiche, frittata, and ratatouille. The key ingredients I was missing were cheese and onion. So in an attempt to make up for a serious lack of some of the most important food staples, I upped the presence of veggies and threw in a crust. I actually found it quite delightful, and because I made an entire baking pan full of Quichetátatouille, I was thankful it turned out well because it was lunch and dinner for a few of days out.

I honestly don't know how I could ever run out of onions because I use them in every recipe (that's probably the reason right there). However, I was not disappointed in the outcome. I feel like the flavors balanced just fine, and onion usually acts as a balancing agent in most recipes. I upped the garlic for depth, plus you can never have too much garlic, and the farm fresh eggs with orange yolks that I threw in took care of the richness that cheese would usually have. Because of the warm mixture of traditional ratatouille veggies, the eggs and wealth of ingredients of a frittata, and the crust of a quiche, here is my Quichetátatouille. All in all, it was a win. So, here is my procedure.

Quichetátatouille
1 Pie crust, rolled out into a square baking dish
Olive oil
4 Cloves of garlic
1 Zucchini
2 Celery stalks
2 Carrots
4 Stewing tomatoes
2 Bell peppers
Salt
Black Pepper
Herbs de Provence

Heat the oven to 350º. The first step is to prepare the pie crust. Roll it out into a rectangular baking dish, big enough to fit all your ingredients. I baked it in the oven for about 8 minutes before I added the ingredients, you can prepare this as you would prepare a quiche crust, and that is weighted with dry beans or with a slightly smaller baking pan placed on top of the rolled out crust. This will prevent the crust from bubbling up in the center, and it will cook evenly.

I cut my ingredients into whatever shapes I thought would look cool layered in a baking pan, but you can just go for slicing or cubing at about an inch measurement. The only thing I would strictly recommend is slicing the tomatoes in half moons, so for every whole slice of a tomato, just cut that in half and you have your top layer. The tomatoes on the top really worked well in the oven, as they were still moist, but had that taste of oven-roasted happiness.

For the eggs, I chose to use 5, but you can increase and decrease at your discretion, it just depends on how fluffy you want this Quichetátatouille. Beat those eggs to oblivion with a whisk to ensure maximum fluffiness. You can also add heavy cream or milk at this point, as well as the seasonings to taste.

Distribute the veggies as you see fit inside the warm pie crust. I like to layer, as I would a ratatouille, but you can just throw them in there, as long as they are mixed up, because they'll be swimming in a sea of golden eggs in a minute. When the vegetables are all settled, distribute the egg mixture (with seasonings) evenly. Make sure that the seasonings haven't all settled at the bottom, so give it a good whisk before pouring it out. Alternatively, you can season each individual layer that you make, to ensure that all of your Quichetátatouille is seasoned. Now you are ready to pop it in the oven. It took about a half hour to get it to the softness and bubbly happiness I was aiming for. I would gauge the time by the doneness of the crust, if it is starting to get dangerously browned, it is probably time to take it out of the oven.

This dish is great with a side of cheese and crackers. I actually used it with a side of spreadable cheese, crackers, and my homemade tomato jam. Delicious! Then, I continued to heat it up for breakfast, lunch, and dinner for a few consecutive days. It kept very well in the fridge! On top of all that, this meal is rather healthy considering that it lacks the weight of butter and cheese.

In addition to simple sides for a light meal like crackers, you can make it a side for a more complete meal. I think it would be wonderful aside a salmon fillet, tilapia with beurre blanc, roasted chicken, or warm brie and grapes MmmMmm! When in doubt, it does stand well on its own. Enjoy (for many days to come)!

Friday, September 21, 2012

Sesame Almond Chicken: A Quick and Elegant Dinner

I don't often keep meat hanging around the house, but when I do, I like to dress it up a little bit. Today we have a nice lean chicken breast on the menu, ready for a marinade and a healthy crusting of sesame and almond. Normally, I prepare this just as pan-seared sesame chicken, but I had such gorgeous blanched almonds hanging out in the pantry, I just had to pair them with their sesame buddies. This time, I decided to give it a whirl in the oven, joined by a side of almond haricot verts (a fancy name for french green beans) and a mixed salad with an agave-balsamic vinaigrette.

I assembled the marinade first and let the chicken bathe in those juices, refrigerated, until I was finished preparing the rest of the vegetables. After the beans are cleaned and snapped, the salad washed and prepped, the vinaigrette prepared, and the oven preheated, the chicken was probably in the marinade for about a half hour. You could marinate it longer if you want, but I was satisfied with the taste of the chicken as it was. Also, a note on the haricot verts, you don't have to go crazy with the almonds if you don't want to--I just love them to death, so I threw some more in the pan with them. I took it easy on my roommate though, and just sprinkled a few on her end (slowly getting her into eating nuts as a component of a meal, it's a texture thing ;) ). Let's see what we came up with:

Sesame Almond Chicken 
with Haricot Verts and Salad with Balsamic-Agave Vinaigrette

2 chicken breasts, cut into 4 pieces
Soy sauce
Orange juice
1 T Chili sauce (I used Vietnamese chili paste: Sambal Oelek)
1 t Brown sugar
2 Cloves of minced garlic
Blanched, sliced almonds
Black and white sesame seeds

Haricot Verts (fresh green beans)
1 Clove garlic
Almonds (optional)

Spinach
Red cabbage
Carrots
Olive oil
Balsamic Vinegar
Salt
Thyme
Black Pepper
Agave nectar

To make the marinade: combine about 1/4 cup each of orange juice and soy sauce together, if you see you need more to really drench those chick-chicks well, add more! Then mix in the chili paste (you can use your favorite Asian chili sauce here: Sriracha would be a good choice too), brown sugar, and garlic.  That's your marinade! Congratulations, now toss in some cleaned up chicken breasts, cover and set in the fridge so that you can get on with the rest of the activities. Again, 30 min did it for me, but you can increase the marinating time if you want.

Preheat your oven to 350º

Mix up your almonds and sesames in a shallow plate or bowl, just to get it out of the way, and set aside. This will become a component of your chicken assembly station, consisting of taking the chicken out of the marinade, dredging it in the sesame-almond mix, and placing it on parchment paper (I learned this the hard way) on a baking sheet.

Now you have to clean and snap the ugly ends off the beans, and mince the garlic that will go along with the beans. Set this aside as well.

Prepare your salad greens (I used spinach, carrots, and red cabbage for that punch of color) and your vinaigrette. Vinaigrettes are so easy! Take your best olive oil and measure out about how much dressing you'll need, then throw in about a quarter+ of that in vinegar, squirt agave to taste, and season with salt, black pepper, and thyme, also to taste. Mix, taste. Mix, taste. You'll get it, don't you worry. Do not get excited and drown your salad in the dressing just yet--you must wait until right before you serve to dress the salad, otherwise it will wilt and that would be too sad.

By the time you've finished this list of chores, your chicken should be ready, and the oven should be thoroughly preheated. Give the chicken one last toss about in the marinade and start your assembly line. I recommend lining the baking pan in parchment paper because it will stick to the pan--not impossibly, but it will stick and you will have more to clean up. When each chicken breast has been evenly pressed into the sesame-almond mixture, place them on the baking sheet and into the oven for about 20-25 minutes.

While the chicken is in the oven, heat some olive oil in a large pan on medium-high heat. When the oil starts to shimmer toss in the green beans and start your sauté. When they begin to get that brilliant green, add the garlic and optional almonds and toss frequently until fragrant. Season with salt and black pepper. If you have managed all of this and the chicken still isn't finished, great job, now put a top on it to keep warm. Timing takes practice too ;)

To plate: Place a couple pieces of chicken on one third of the plate, on the other two thirds distribute the  beans and the salad. You can choose to drizzle the vinaigrette directly on the salad, or give your guests the opportunity to serve themselves at the table. Now you are ready to go! Enjoy your meal!


Thursday, September 20, 2012

El Mundo: Worlds Away from Your Average Mexican Joint

Last weekend, I had the opportunity to go out with my best friend for some serious dining. Said friend is who I would consider my intellectual match, so going out with her provides the boost I need to get back into more brainy activities like reading books, discussing literature, philosophizing, etc. These are things I miss from wasting away the afternoon in the Quad on campus, exercising the aforementioned with fellow classmates. In the wake of entering the career world (aka the grown-up world), I forgot that such activities are what really make life interesting--besides experimenting in gastronomy of course. I must divulge the challenge that came from this dinner conversation: To read Ulysses and to take part in the next Bloomsday celebration. Challenge Accepted. Hah, we'll see if I survive.

Okay, now that we've passed the gratuitous musing stage, we can get to what we are all here for: THE FOOD!
Today's provider of tasty morsels: El Mundo
Cuisine type: Mexican, of course.
Location: Frankfort Avenue, Louisville's Clifton Neighborhood

The first impression that I had of El Mundo even before my first visit was that it had to be an incredible place to eat. Just passing it on a walk or drive down Frankfort could tell you that. It is always overflowing with people, the smell wafting through the air really will make your mouth water, and just a peep inside at the colors and decor tell you that the restaurant isn't just the real deal, but they absolutely love what they've built together. And so do I!

The first floor of El Mundo is always busy with people placing take out orders, and the small dining area, consisting of a few tables, is always full. We stepped right outside again, turned left and followed a staircase to the second floor, where we could take a seat in their full dining room. In addition, they have a patio area in the back for nice weather seating. The hosts and waitstaff are always friendly and approachable. We had to wait for a few minutes, which gave us the chance to grab one of their legendary margaritas at the corner bar. Let me draw your attention to the detailing here too: the colorful decor, the tin tiles, the glass and shell art, and my favorite, a framed poster of Frida Kahlo at our dinner table. It's a place that makes you feel good, and I would say that this is because it fulfills the needs of all 5 senses. You'll see why in a second.

Carnitas

At the table, we had our margaritas in hand: my friend's a frozen mango, and mine a strikingly fuscia prickly pear on the rocks. Then we ordered an appetizer of chips and guacamole. Their smooth guacamole is on point--and you all already know of my love of the fine balance of avocado, cilantro, and lime. El Mundo's guac also includes tomato, which gives it more substance as an appetizer, instead of just a condiment. Plus, the hearty tortilla chips have an incredibly gratifying crunch, that hold up well against the thick guacamole.

Tamales
For the main course, my friend chose the delectable carnitas, and I the tamales. The carnitas had a wonderful char on the vegetables from the pan sauté, much like the taste that many associate with fajitas, and the pork was as tender as they come. My table mate was more than satisfied with her choice. As for the tamales, my goodness, the mole sauce is the best I have had in this city! Mole sauce is very complex, and is often subjective in taste, but to me El Mundo has hit the nail on the head. The warm spices from the ground chilis, cinnamon, and nuts creates an unmatched accompaniment to the soft, meat-filled tamales, presented in their thoughtfully wrapped corn husks. Along with a garnish of corn, mexican rice, and refried beans, this plate is what I would deem one of the legendary dishes of our city. It is quite a bit of food as well, so I was satisfied without moving on to dessert.

At the end of the night, we had to take a little stroll up and down Frankfort to reflect on the awesomeness we just consumed, and to enjoy the beautiful weather of our pre-fall season, as well as a stop at Bourbon's Bistro. I'd say it was another magnificent evening at El Mundo, and I look forward to my next delicious experience soon.

¡Que aproveches!

El Mundo
2345 Frankfort Ave.
Louisville, KY 40206
Phone: 502.899.9930
Email: elmundo53161@bellsouth.net
Website: www.502elmundo.com
Also find them on Facebook here