Monday, January 14, 2013

Comfort in a bowl: Tomato-poached eggs

I know the season of the almighty tomato has passed, but there are actually some pretty impressive hydroponic tomatoes showing up on those sad supermarket shelves (I'm sorry, but nothing beats a shining mountain of heirloom tomatoes at the market). What brightened my day even more was seing that glorious Cento can of San Marzano tomatoes--best sauce-making tomatoes in the world!!! **happy dance** I don't know about you, but I find myself craving rich tomato sauces in the winter. They are warming, comforting, and are really hard to screw up, so they typically make for a quick meal.

There has been a lot of talk in the food world about poaching eggs in tomato sauce (or just the combination of egg and tomato), and for good reason. I often saw this in Spain, but paired with potatoes. My best example would be patatas bravas served with an egg sunny side up (check out my previous recipe on Patatas Bravas). It's that miracle combination of a velvety, golden yolk with rich tomato. It can't get any better, I promise.

In short, I just made a savory tomato sauce, didn't drain the water retained by the tomatoes, and when the flavors were well established, I cracked some eggs into the tomato sauce to cook until just set. I think that the velvety egg yolk stirred into the tomato sauce makes a really fabulous soup...which gives me an idea... Another alternative could be to add some roasted red peppers to the tomato sauce to intensify the flavor. A few Spanish piquillo peppers, if you could get your hands on them, would also be ideal.

Allow me to present you with the recipe:

Tomato-poached Eggs
4 Ripe tomatoes (or a can of San Marzano whole tomatoes), puréed
4 Cloves garlic, crushed
1 onion, chopped
Olive oil
Sherry
Salt
Black pepper
Bay leaf
Pimentón (smoked paprika)
Chili powder (Chimayo chili)
Eggs

As you can see, we only poached two eggs this time and it was really enough. The presentation is beautiful with a simple soup bowl and that beautiful egg nestled in its warm bed of tomato joy. If you have more of an appetite, you can of course increase the number of eggs, just make sure not to crowd the pan so that it is just one big egg white with some yellow dots. Either get a larger pan or take it easy on the eggs.
As for the tomato sauce, you can really prepare it however you feel like that day. Mine is more spiced, but an herbed tomato sauce (with thyme, sage, oregano, etc) would be just as lovely. My sauce ended up having a sultry savory flavor accented by the bay leaf and smoked paprika. It tasted like so many dishes I had in the tapas bars in Spain and in the homes of the families who took care of me. To me that is comfort food, and since that was the objective of this dish my spice combination really did the trick.
First you heat the olive oil in a heavy bottomed skillet over medium high heat. Throw in the onion and sauté for a few minutes, then add the garlic and sauté until fragrant. Stir in the pimentón, chili powder, and bay leaf and heat for a few seconds with the onion mixture until you start smelling those spices bloom. At this point you add a splash or two of sherry and scrape up any bits that may have stuck to the bottom. Pour in the fresh tomatoes and stir well to combine. If your sauce is too thick, you can splash in a little water or chicken stock, but I don't think it will be necessary. Simmer the sauce for a good 10-15 minutes and crack in the eggs around the 12 minutes mark. They should poach for about 3-4 minutes and should be ready to plate.


It was rather soupy, so I served it in a soup bowl. If yours turns out thicker you can serve it on a slice of hearty, rustic bread or over rice or potatoes. However you serve it, it will be sure to satisfy.

Keep warm, keep hungry, and qué aproveches!

Saturday, January 12, 2013

New Year's Necessity: Black Eyed Peas

***Note: Sorry for the late New Year's post! Just coming down from the holiday buzz and back to full time work, and just getting around to posting this. Enjoy and I wish you all the best in the New Year!!!***

As a good Southern city, we are full of fantastic traditions from our unmatchable hospitality to our history of good parties and bourbon cocktails, and of course a food culture to be reckoned with. I am overjoyed to live here because I discover new culinary jewels everyday from our fair city. Because we are at such a crossroads, a multitude of good cooks have passed through our city and because we love our guests so much, those recipes stay in our already active kitchens.

This year I will continue to explore Louisville's food offerings. I want to go into the kitchens of our hometown and figure out what inspires us to create an endless flow of wonderful dishes. This is our food culture and I hope the coming year brings me a little closer to understanding it as a whole. I can't think of a better place to find local farmers who are appreciated and cooks who respect food. Such a combination can only bring us to great results...so let's see what this New Year will bring.

In order to ensure good luck and prosperity, it is an absolute requirement to carry out the black eyed pea tradition. There are many ways to get these black eyed beauties in your diet, and I'll outline a few for you. However, this year I am going share the traditional recipe for black eyed peas served up with bacon, onion, garlic and spices and served over rice.

Some alternative ideas for black eyed peas:

  • Use them in place of garbanzos in falafel
  • Puree cooked black eyed peas and make a dip for pita or flatbread, season with cumin, olive oil, sesame seeds, and chili powder--I bet a little tahini would go well too
  • Prepare yourself some Texas Caviar. This recipe from Homesick Texan is the best I've found.
  • Whip up a Hoppin' John
  • Serve chilled black eyed pea salad on fresh blinis
  • Slow cook the black eyed peas with salted pork or a ham hock until they turn into some serious New Years prosperity...
Or, you can follow this recipe!
Traditional New Year's Black Eyed Peas
1 lb. Black eyed peas
3 Onions, chopped
10 Cloves of garlic, crushed
1/2 lb. Bacon 
(my preference is a nod to Butertown's past: Fisher's Hickory Smoked bacon)
Thyme
Chili powder
3 Bay leaves
1 T Homemade Chili Sauce (or your favorite chili sauce)
Salt
Fresh cracked black pepper

Get yourself a nice big pot and soak those beans. You can choose quick soak or overnight--overnight is usually the recommended. They will cook thoroughly with the rest of the ingredients. When the beans are soaked, drain the water and rinse the beans. Reserve.

In the bottom of your large pot fry the bacon over medium low heat. This temperature will keep the smoke level low, while rendering the fat you need to flavor the beans. Right when the bacon gets crispy, add the onion and sauté until soft and translucent. At this time add the garlic and sauté until you can smell its fragrance. Before you add the black eyed peas you need to add the thyme, chili powder, and chili sauce, then stir around to toast a little bit. Do not add salt yet...there is plenty of salt in the bacon and we'll adjust the seasonings at the end.

Finally, you add the beans and stir until combined. Add 8 Cups of water and bring to a rolling boil. After that you simply lower to a simmer and tilt a lid on it. From there on you can go take a nap, start a movie marathon, or do whatever you think will take 2.5 hours of your time. I like to check on my beans every once in a while just to see how the flavors and aromas are developing, and to see if there needs to be more water added.

After those two and a half hours you will have some phenomenal black eyed peas. Season to taste with salt and black pepper.

This is best served over rice or with a healthy side of cornbread. I can feel the good luck sweeping over me already!

Enjoy and best of luck and prosperity for 2013! Let's make it a good one!

Saturday, January 5, 2013

Quick and Warm Winter Breakfasts: Pan-fried apples and Oatmeal

I lived in Austria for a year while studying abroad. During that year, the winter was the longest I can ever remember. There was a time when the sun didn't shine for 40 days, and the majority of those days were swirled in snow storms. I actually do have those stories of walking miles to school in snow up to my shins. Still, wouldn't trade those memories for the world!

The best part of that winter though was waking up and knowing that a warm breakfast was in my near future. We had so much fun sharing our recipes among our six roommates and five hungry neighbors (who were just as much our roommates) from muffins to breads to omelets to crepes and finally to today's recipe: pan-fried apples and oatmeal. This quick and easy breakfast is warming to the soul and will keep you well-filled until lunch, or perhaps beyond!

Pan-Fried Apples and Oatmeal
1 Apple, cored and sliced thin
1/2 C Oatmeal
2 T Butter
Brown or raw sugar
Cinnamon
Cardamom 
Apple cider (or water)

Heat the butter over medium heat in a large skillet. Add about a tablespoon of sugar and your seasonings and melt into the butter. Add the apples and fry in the sweet seasoned butter until they begin to soften. After a few minutes you can add the oatmeal and fry it up with the apples. When the oatmeal begins to toast you can add in your liquid. We added apple cider and it was amazing! I normally add water, so that works too, but the cider really packed a punch of flavor.  Finally, put a lid on it and lower the heat. The oatmeal should soak up all of the liquid and you will be left with a glorious bowl of happy, warm breakfast.


Bon appétit!!

Wednesday, January 2, 2013

A Meal to Celebrate: Simple Salmon, Roasted Fennel and Potatoes, and Asparagus with Fennel-Orange Gremolata

The Handsome Spaniard and I were fortunate enough this year to be able to spend Christmas together. The trip was full of fun and frivolity all around Louisville, and there wasn't a bad day among the festivities. We were always with good friends, enjoyed some fantastic nibblies, and celebrated the holiday as we all should, with smiles and tons of laughter.

The best meal we had, in my opinion, was one that we prepared together. Dilled salmon baked in the oven, roasted fennel bulb and potatoes, and asparagus with fennel-orange gremolata. For dessert we still had a little Spanish turrón leftover...if you've never tried turrón, it comes in many forms, but the traditional one is a sweet made of almonds and honey and is so incredibly delicious.

Sounds like a lovely meal, right? It helped to be in the best company in the world, at a table set with flowers and Christmas decorations. It's the small details that make the most unforgettable moments :)

For the salmon, I followed Mark Bittman's recipe, because salmon really is something that you should keep as simple as possible, especially if it is delicious wild Alaskan salmon. I melted a few tablespoons of butter in the oven pan in a 425º oven. I threw some dill in there and let it melt with the butter for about two minutes before throwing the salmon skin-side up on the hot pan. I let that sit in the oven for about 5 minutes, at which time I removed the skin (it peeled off like a dream), flipped it over, and returned it to the oven for another couple of minutes. We like our salmon underdone, so if you like it more well then you should add a little more time.

The fennel became the star of the side show, bringing its delightful flavor and its many variations to the table. For the roasted potatoes and fennel bulbs we simply peeled and quartered red potatoes, and cut the fennel bulb, green stalks removed and fronds reserved, about the same size as the potatoes. Tossed it simply in olive oil, salt, and pepper, and roasted that up for about 40 min in a 375º oven. This side stayed warm set on top of the stove while the salmon was cooking.

The asparagus received a quick sauté in olive oil over medium high heat, then I topped it for a few minutes to cook through just until tooth tender...not soggy! The gremolata I prepared was not a true gremolata because I was lacking fresh parsley, but what we did make was a perfect compliment to the asparagus. I took 1/4 cup of olive oil and mixed in the zest of 4 clementines, and the chopped fronds of the fennel...a little salt and we reached perfection. It was light, the citrus rocked out the asparagus, and it was even nice drizzled atop the roasted potatoes and fennel bulb. I used the extra gremolata on toasted bread for the next few days.

If everything is prepped and ready, this is a really easy meal to time and bring out fresh. The natural presentation is beautiful and full of color, a perfect addition to a festive table.

I hope that your holiday celebrations were as magical and wondrous as mine! As you prepare for the New Year, I hope that you have many more great reunions and meals to share.
Happy New Year!

See you in 2013!

Saturday, December 29, 2012

Complimenting the Snow with Tempura Okra

Christmastime has passed and I'm back to pay a little more attention to the archives of Louisville Lady Gourmet. I really hope that you, dear readers, had as much inspiration for culinary greatness as I did over the holiday. In my free time, I was combing the massive collections of recipes that were flooding from my fellow bloggers and food writers, and boy was I excited. I also reviewed some traditional methods that I want to perfect and keep in my culinary arsenal.

The New Year is on its way (can you believe it?), so that means making new goals and trying new things...at least for me. I really want to investigate a few styles of cuisine that I have experienced or even cooked before, but want to see what I can do with the ingredients we have here in our fair city.

I got started early on my goals by tackling Tempura. I believe that anyone who tries tempura is truly amazed at what the Japanese have done to fried food. Tempura, if prepared correctly, is minimal on the grease, texturally exciting, packs massive taste from both the batter and the fresh ingredients, and is completely addictive. Oh yes, addictive.

So, what can you tempura fry that excites the Louisville palate? Only one of my most favorite foods in the entire world: Okra! I fried the okra whole, and doing so yielded an ethereal taste-bud explosion. The whole okra was beautifully crispy on the outside and was not soggy at all in the center. The okra seeds in the middle have always been my favorite to eat, and this tempura okra kept the seeds moist for optimum popping.

For seasoning, I simply went for salt and chili powder to give it a little kick. I felt like a tempura dipping sauce would have been a little much...and might not allow the integrity of the okra to shine through. Being the first time trying it, I wanted to get the full effect. I think that a lighter sauce, perhaps with a citrus base instead of soy base would go well with these. Honestly, I was satisfied just popping them in my mouth until they were all gone.

Let's get on with the tempura technique. I think that the tutorial by Chef Tadashi Ono via Saveur is spot on. I'll outline what I did here and you can check out the video and tutorial on Saveur from there!

Tempura Okra
2 1/2 C Cake flour
2 Egg yolks
2 C Ice water
1/4 C Crushed ice cubes
Fresh Okra

Dredging in cake flour first
This recipe can be used for any vegetable, herb, or meat that you want to cover in a perfect tempura batter. If you are going for meat, shrimp is the most popular and delectable. Vegetables should be in uniform shapes, you can even tempura herbs--my favorite is tempura parsley...it's like eating bright, flavorful lace. Make sure that everything is prepared before you even start on the batter. That means whatever you are frying needs to be washed, dried, and brought to room temperature. This will maximize crunchiness.

Heat a cast iron skillet with about an inch of canola or vegetable oil to 360º add 1/4 C sesame oil before you start frying for that authentic tempura flavor. Plus, it smells awesome! If you don't have a thermometer, check the temperature with the batter. The batter should bead and immediately rise and bubble to the top.

Put 1/2 C cake flour on a plate to dredge the okra in first. This step will help the tempura batter adhere to the okra. You can dredge them before your prepare the tempura batter to ensure that the batter is fresh. When the flour from dredging and the batter meet, you get that quintessential tempura batter with crispy bits intact!

Tempura batter mixing with 4 chopsticks
Now for the magical batter.
Place two egg yolks in a large bowl. Using two chopsticks mix the yolks with 2C ice water, ice included. This reduces gluten absorption. Then grasp four chopsticks and hold upright so that they make a square in the bowl. Do not use a whisk, do not use a fork, just take the chopsticks without fear (and a little practice), and gently incorporate the flour with the egg-water mixture. Your batter should be lumpy because those flour bubbles are gold. The batter will reach the consistency of heavy cream. At this point your oil should be hot and your okra should be dredged and ready for action!

Leave room for even frying!
Using just two chopsticks now, pick up the dredged okra one piece at a time and swipe it through the batter and directly into the hot oil. Do this quickly until you have filled up the pan about 3/4 full. The okra needs to have enough room to cook evenly and not stick to itself. Make sure that they have room. Gently stir and take your chopsticks to drop more batter on top of the okra pieces. If you have some pieces left over, you can strain those out and serve them as a bed for the tempura or reserve them for toppings on salads. After about 2-3 minutes they should be fried. The color should be just turning to golden...not brown, not white as the batter, but just thinking about turning. Then quickly remove the okra and put them on a baking sheet lined with paper towels.
Drain on towels
Fry in batches until you are all out of okra. Remember to sprinkle with seasoning while hot. Then immediately consume with joy and happiness knowing that you can take techniques from across the world and transform our ingredients here at home. Stay curious and stay hungry!


Final product! Eat away!
めしあがれ!


Saturday, December 22, 2012

Sweet Holiday Happiness: The Best Chocolate Chip Cookies!

I know, I know... it has been far too long since I have posted, but I do have a great excuse! The Handsome Spaniard is in town for Christmas and we have been busy celebrating and I have been busy preparing everything!!! Anyways, amongst all of this happiness, I have definitely had some delicious meals lined up. Today, however, I will share a sweet treat with you...the best chocolate chip cookies in existence.

Now, I will warn you that this is purely chocolate chip, nothing else special to add texture or complex flavors. Yes, it is weird coming from my kitchen, but again, I am not a natural baker :) That is usually left up to my dear roommate. My goal though is to build up a base of staple baking recipes so that I can hold my own in the kitchen, no matter what's thrown at me. I also have a brownie recipe that kicks ass, but I'll have to bring that up another day!

These cookies were a dream! I made them as big as my outstretched hand, because let's be honest, cookies shouldn't be the size of half dollars--that's just wrong. They were soft in the center with a slight crunch, and they could be reheated to softness even after a few days. Perfect with tea, a nice breakfast (for the soul not your health), a good ending to lunch, the possibilities for cookies are endless--I'm sure I don't have to tell you that!

While on the search for this recipe, I went to my normal go-to references like Epicurious, Bon Appetit, Gourmet, various food blogs, and of course my recipe book collection, but I found that a basic chocolate chip cookie recipe was not really part of my arsenal of great recipes. Then I was taking a listen to Lynne Rossetto Kaspar on the Splendid Table and I thought that she must have a published recipe on the best chocolate chip cookies ever...and sure enough, there they were.

There are times when a warm chocolate chip cookie out of the oven is just what you need to make a rainy day happy, a rough day at work a little more tolerable, and to keep that chocolate craving from taking over your life! Cozy up with your mixer and preheat that oven...it's time for some cookies!

Best Chocolate Chip Cookies
2 cups minus 2 tablespoons (8-1/2 ounces) cake flour
1-2/3 cups (8-1/2 ounces) bread flour
1-1/4 teaspoons baking soda
1-1/2 teaspoons baking powder
1 1/2 Sea salt
2-1/2 sticks (1-1/4 cups) unsalted butter, softened
1-1/4 cups (10 ounces) light brown sugar
1 cup plus 2 tablespoons (8 ounces) granulated sugar
large eggs
2 teaspoons natural vanilla extract
1-1/4 pounds dark chocolate chips
Vanilla Sugar
Dark Chocolate Sugar
Orange Fleur de Sel

Okay, so as far as I can deduce, baking is as simple as measuring accurately, mixing up your dry ingredients and your wet ingredients and then incorporating them together. Finally you throw it all in an oven at some set degree and you wait between 8 min- 1 hr for whatever it is you are cooking to puff up into happiness. That's the approach we're taking with these cookies too!

First you need to sift the flours, baking soda, baking powder, and salt in a bowl. Reserve.

Cream the butter and all of the sugars together in a mixer with a paddle attachment. They should be so creamy they look like fluffy, buttery sugar clouds whipped into ribbons in your bowl. Add the eggs one at a time and mix thoroughly between each egg. When that's done mix in the vanilla!

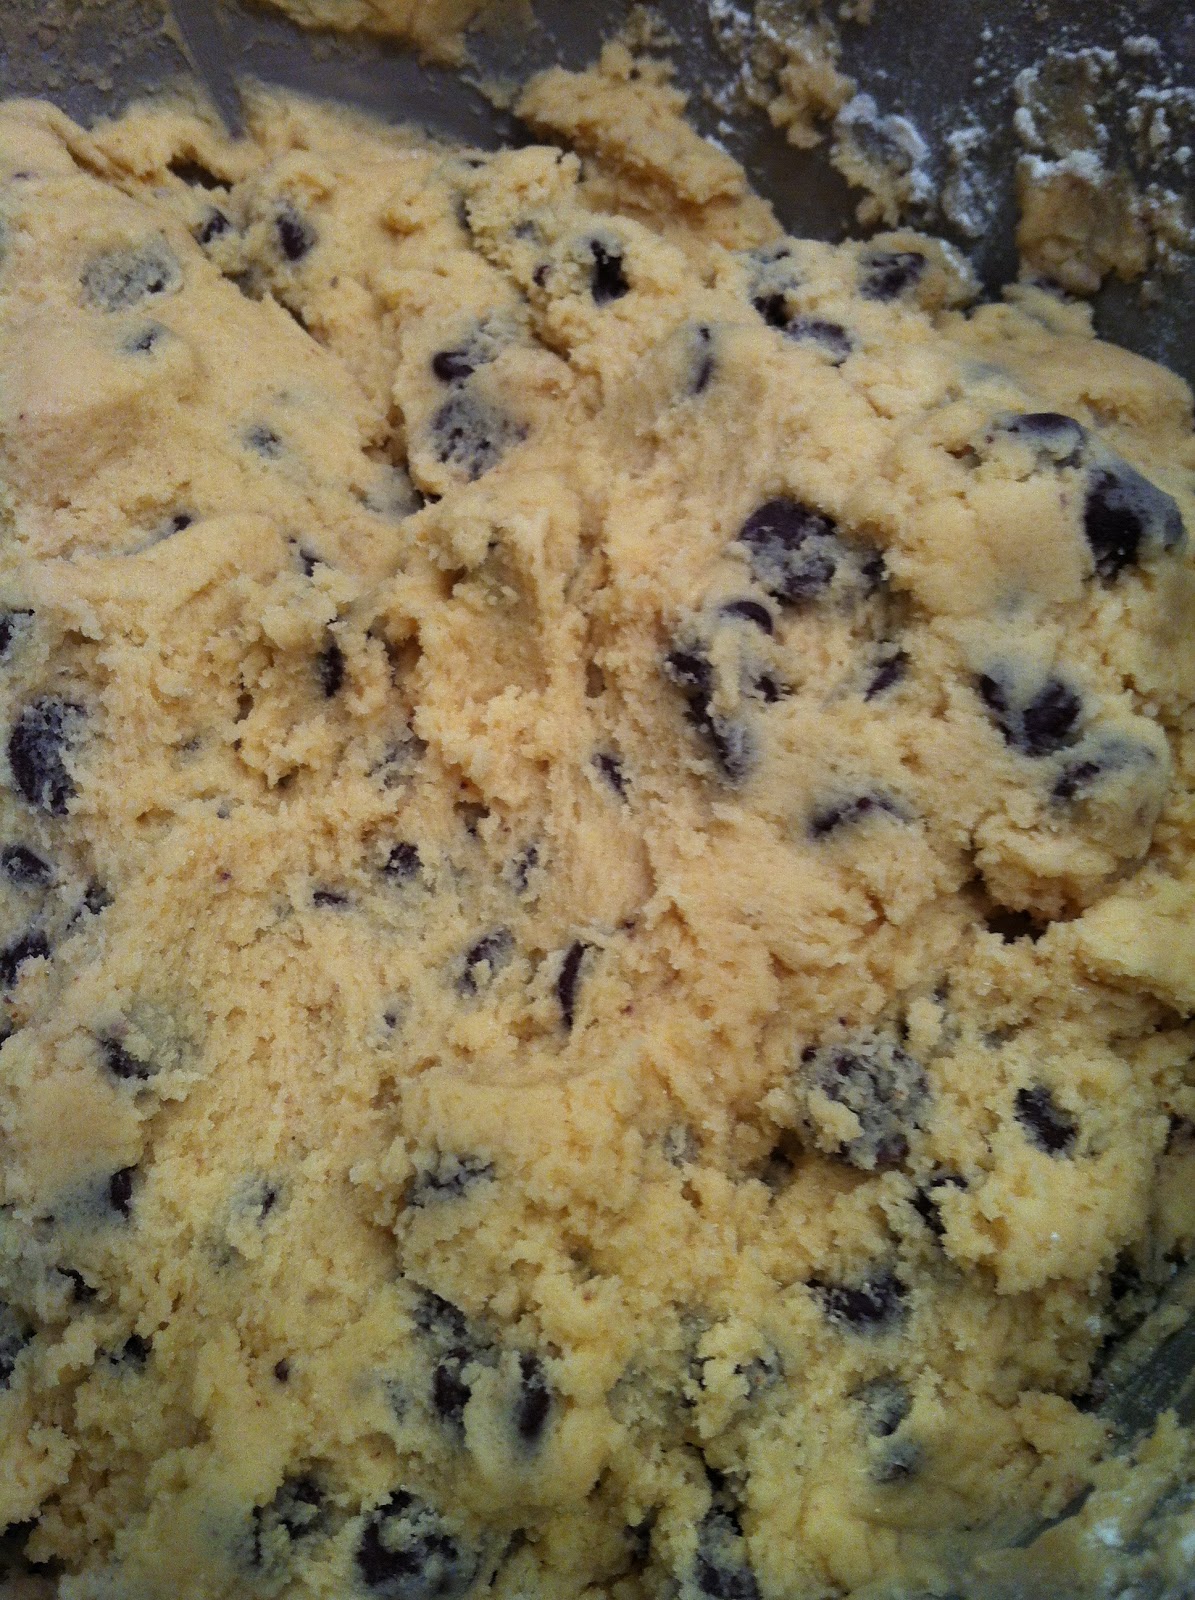
Mix in the dry ingredients on the low setting until just incorporated. Add the chocolate chips and fold them into the dough until just combined. You just made chocolate chip cookie dough! I feel like I eat half of the dough before it gets in the oven...this dough is irresistible...mmmmmmmmmmmmmm!!!

I cooked these in a preheated 350º oven for 19 minutes on baking sheets lined with parchment paper.

When they came out of the oven, we added a little sprinkle of something special while they were still hot. My choice is definitely the orange fleur de sel---it put the basic chocolate chip cookie into the realm of incredibly awesome. We also had vanilla sugar and dark chocolate sugar, which were wonderful as well...I think I would be a little more heavy handed with the sugars to get the same wow effect as the fleur de sel--but that really makes it special.

Finally, stack these babies up and give them to everyone you know. Share them over a tall glass of milk with your neighbors, bring them to work, sneak a few in lunchboxes to share, and make sure that you get your fair share as well. The season of giving shouldn't just be reserved for December, so tuck this recipe away and use it whenever you need a solid pick-me-up!


Enjoy!!!

Wednesday, December 12, 2012

There'll be parties for hosting...And hostesses for gifting!

If you haven't yet been to your first holiday party of the season, chances are that it is coming up this week! We recently went to an open house party from a new neighbor of ours, so I can say that we've already started our merry-making outside of trimming our own tree. Also, it is about time for those work parties to celebrate the end of the year, but that's another story altogether...

I want to talk today about visiting friends and family, or accompanying your significant other on their visits to friends and family for holiday parties. Today's important subject for discussion: The host/hostess gift.

Let's turn back the clock a little bit so I can give you a full picture on my relationship with hostess gifts. I started throwing my own parties in college, where I was quite involved with international exchange students and getting them acclimated to Louisville. Whenever we would have them over for a big dinner or any get-together at our house, most of our guests would bring over a small token of their appreciation...mostly in the form of wine. There is even a word for this gift in German: Mitbringsel. It means something to bring with you. I'm just going to go right out there and say that this is a dying yet necessary art in our culture, so let's bring it back!

If you have ever thrown a party you know how much time, energy, and resources goes into gathering up your loved ones and having a successful soirée. If you are going to one of these planned soirées, it is a nice idea to bring a little something to pay back the hosts' investment in your happiness, right? Most people usually throw in the required "Can I bring anything?" line, but a sincere thought into a small gift can go beyond just absorbing the gluttony of a mob of holiday guests.

When I spent my time abroad and was considered an exotic foreigner (laughable, I know), I would bring something from Louisville to share with my friends. This still holds true for those of us who have to travel outside of Kentucky to celebrate the holidays with family. It's really easy for us to gift things from our hometown...the home of Bourbon...please. I also got creative and painted a plate from Louisville Stoneware, brought a small bat from Louisville Slugger, and basically raided WHY Louisville and took the store in one of my suitcases.

If you are spending the holiday in Louisville though, here are some suggestions for small gifts that you may give to your hosts during your many holiday party runs. I recommend edible gifts for this time of year, and you really don't have to overdo it--it's not a Christmas present, it is a hostess gift, so it is meant to benefit that person and his/her partner or immediate family. Thus, keep it small and sweet. Some of the smallest details are the best remembered.

If you are into canning, you can simply gift one of those half-pint jars with a sweet ribbon and a label telling your friend what is inside the can, who it's from, and perhaps how to use it. Some seasonal ideas for this could be apple butter, homemade applesauce, pumpkin butter, Green Tomato Chutney, Tomato Jam, etc. Also...I have found that gifting a jar of my Homemade Cozy Granola (in whatever combination I had made that week) is always well received, and often freaked out about.

If you have a favorite brownie or cookie recipe, you can easily measure out the dry ingredients in layers in a pretty jar and attach your recipe (just add egg and milk, etc!) on a ribbon around the jar. If you are one of those people who guard their recipes like Fort Knox, and I have a bone to pick with you, this will keep your magical ratios to yourself (please, get over it...good food needs to be shared!).

I have often seen this done with cocoa by mixing up their special homemade hot chocolate recipe and gifting it in a jar as well. The great thing is that it is a cinch to personalize, it is going to be enjoyed no matter what, and it is easy to whip up. Seriously...dumping stuff into a jar and tying a ribbon on it...can I make it any simpler for you? No. If you want to get fancy, here's an idea for you: Take dark cocoa powder, mix it with sugar, chili powder, and cinnamon, and gift that little Mexican-inspired hot chocolate surprise...of course you need to test out the ratios to see what you like--and then it's your recipe, not mine!

Have you ever made a house seasoning? This is a cute little gift to give, and it is impressive to boot. If you have a certain combination of herbs and spices that you think rock out together, throw them in a little tin with sea salt, shake it up, put a bow on it, and label it as your house seasoning....bet you didn't think you had one of those. Now your host does too!

Finally, if you are already making an obscene amount of cookies or candies, you don't have to go out of your way to make something else...just wrap up a small amount in a cute box or a festive bag, and there's your present. Do you make a good party mix? Can you candy up some nuts? Put a bow on it and hand it to your happy host when they greet you at the door.

If all else fails, your life is a mess, you are working overtime, and you just want to get to that damn party and blow off some steam, do me a favor and hit up the drive-thru at Old Town Liquors on your way to the party and at least pick up a bottle of wine. If you don't know what to get, those guys can help you out with anything, so you don't even have to worry about it!

It kind of makes sense to gift to the host during this time of year...the time of great gift-giving. However, host gifts should be brought to all parties where the host actually orchestrates an evening of well-planned frivolity. You can start now!!!

Happy Holidays and stay safe during all that merry-making!